DIY Christmas Doormat

Christmas Doormat DIY


“It’s the most wonderful time of the year….”  I planned out a few DIYs to share for December and to kick things off I’m sharing this fun DIY Christmas doormat!  The hardest part was to choose what to put on it.  There are so many good ideas out there! 


I decided to start with a simple Merry Christmas since this was my first time making one and to be honest I’m glad I did.  This was not a hard DIY but it did take longer than I thought it would.  Let me share how I made it…..

What you’ll need:

Plain Doormat

I picked this one up from Ikea but I found the same one from Target too (click here).

Acrylic Paint

1 – 2 bottles depending on what you are putting on your DIY doormat.  (For this doormat I used 1 bottle). There is special outdoor acrylic paint but I just used what I had.  You can find this pretty much everywhere Amazon, Walmart, Michaels, Dollar Store, Jo Anns, etc.

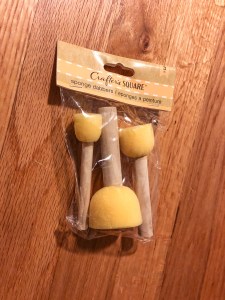
Spouncer brush and small paint brush

These are also available in lots of stores!  The dollar store, Michaels, Amazon, Jo Anns, etc.

Now that you’ve gathered your supplies let’s jump into how to make your own DIY doormat! 
First, I printed out a stencil with my Cricut machine.  This is optional but my handwriting is not that beautiful so I needed all the help I could get.
Download the SVG file:


MERRY

and 
I printed out the MERRY 6″ by 12″ and the CHRISTMAS 12′ x 24″.  I only have 12 x 12 mats so I split CHRIST and MAS to cut the size I wanted.
For the MERRY I used contact paper but after struggling with it moving around and sticking to itself I switched to heavy card stock for the CHRISTMAS.  I may try iron on vinyl next time I make one but the heavy card stock worked just fine!

Start by laying out where you want the stencil to be.  The contact paper did not stick and I tried to secure it with painters tape.  I switched to heavy card stock later and it was much easier. 
Take the spouncer brush and glob on a generous amount of paint.  Start by dabbing on NOT paint on along the stencil.  You want to try to get ‘crisp’ edges and not smudge the paint.  Once you covered the letter switch to a small 1/2″ paintbrush and dab some more paint in the middle of the stencil to fill in the gaps! 
This took more paint than I thought it would and I ended up using a whole bottle for this project.  The doormat doesn’t soak the paint easily so it took a few layers.  
Repeat this over and over until you cover it all. 


Ta Da!  That’s it, your very own DIY Christmas doormat.  You could spray on a clear coat to protect it but our front door has an awning so its a little protected from the elements.  So far it has held up fine!  My back was not happy when I was done but I felt pretty accomplished to have made my first DIY doormat to kick off the Christmas season!
Below I’ve linked a video to show you what I did.  I’ve linked all the items so if you decide to make one let me know so I can check it out!

Video Tutorial

You Tube

Stephanie

Sharing all things motherhood, life +style, food, travel, military family life, etc.

Suggested Posts

Leave a Reply

Your email address will not be published. Required fields are marked *