
What To Do:
Here is a quick run down of how I made these DIY wooden pallet signs. I made these for my daughters class to make Father’s Day presents so I need ~20 mini wooden pallet signs.
I cut down the sides and middle on the pallet to free up the boards without spending a lot of time prying off the nails. Depending on your pallet and your sign size this method may or may not work.
For the shorter pallets I cut down the one side and pried off nails from the other which is still easier than prying nails off both sides. The chances of it splitting or breaking are much less when one side is already loose.
After you have a stack of pallet boards cut to similar sizes, I made them 1 ft long, you will need to sand them down. Most are unfinished so sanding is a must. I used a table saw to trim down the sides and clean up the ones that broke. I used those broken pieces to adhere to the back securing the sign.
Then I laid them out trying to match them up to make them about the same size. They will not be perfect but that is part of the appeal. Instead of taking perfect boards and distressing them these have the natural weathered look already.
A quick coat of wood clue and staple gun to secure the backing finishes up you DIY wooden pallet sign. I left them overnight to dry/bond. The next day I gave some a quick stain and others I left natural.


Step 1
Print and cut out the heart template here.
If you plan to add a quote or wording in the middle then you’ll need to apply it now. I used my Cricut to cut out this vinyl then added a little mod podge to keep it in place. You could stencil something or write something or leave it blank.
Place the heart template to guide where the nails get hammered in the middle to create the heart shape. Then tear off the paper heart template. Lastly, around the outside border of the pallet sign I hammered more nails.

Step 2
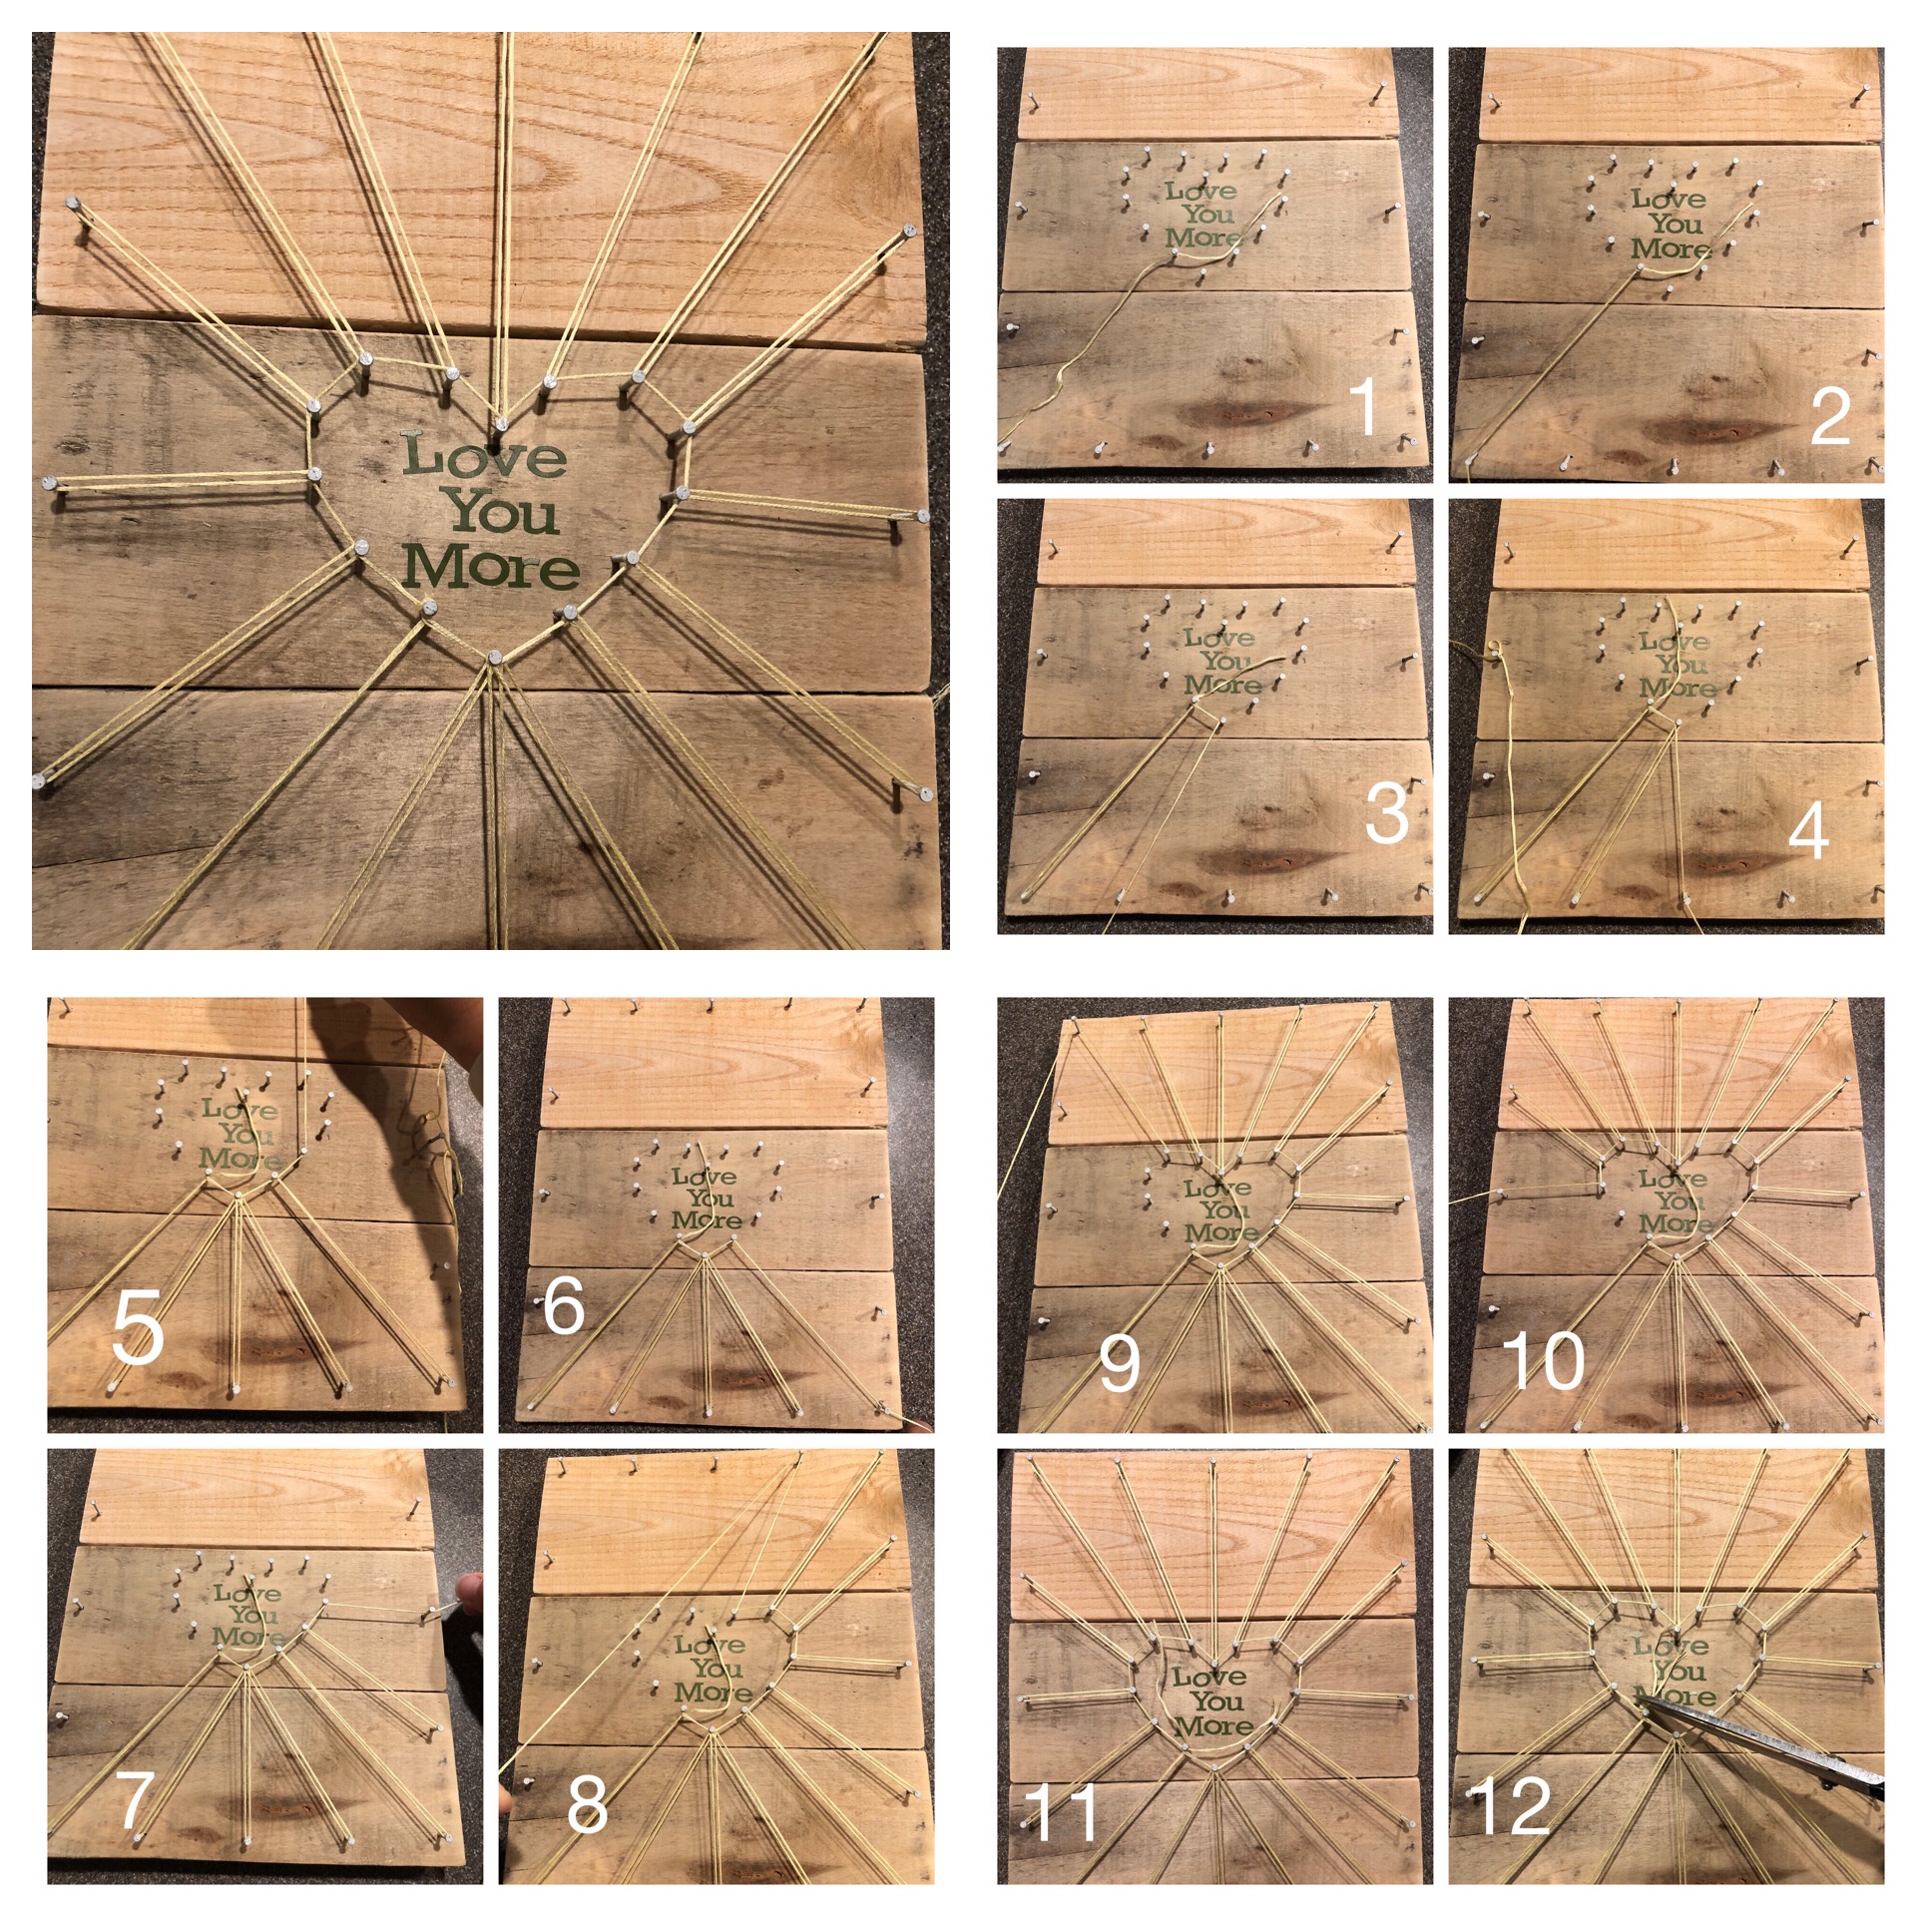
Starting with the bottom of the heart. Tie down your embroidery thread and loop the string to the outside then back. Loop around before moving to the next nail on the heart.
Repeat – loop around nail on the heart then out and back before moving to the next nail.

Step 3
Continue looping around nail on the heart then out and back before moving to the next nail.

Step 1
Continue until finished then tie down the thread and trim.
If you want to make it duo colored you would repeat all of the steps with a different colored embroidery thread.

Step 2
This budget friendly string art pallet sign was a hit and makes the perfect gift! There are so many possibilities for customizing/personalizing it with sayings, patterns and colors.
You could also purchase a wooden sign to serve as your base and I have seen them all over at the Dollar Store, Target, Michaels, Jo Anns, or Amazon.


